|
Although I have done quite a number of a projects before, I do not think there is any right or wrong place
to start. But clearly things have to be removed to be de-rusted, repaired or replaced, and once things are removed it
may be many months (or even years) before they are put back into place.
So a really careful investigation to see how it all goes together, plus plenty of photographs, measurements and
notes are vital. Luckily digital photography makes this whole process a lot easier.
My first priority has been to try and get all of the dump body parts off the back and some wheels and tyres that allow
the whole thing to be moved reasonably easily.
The next thing is to get the engine out so that work can start on that, and while it is out the chassis and other key
parts can be cleaned off. Although I have sandblasting equipment (powered by a WW2 compressor) it may well be that I
get a specialist in to do it.
The other main task was to dismantle the very rotten cab (which will need to be extensively rebuilt) but taking
careful measurements and lots of photos.
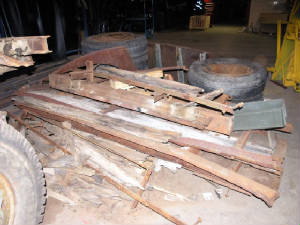
Unloading the back was reasonably easy, although I have ended up with a huge pile of parts (sorting them all out will
be a task for the coming weeks)
I was lucky enough to purchase a number of 24 inch 10-stud wheels, and after an interesting trip into deepest darkest
Lincolnshire in a Transit van which was only just big enough, got them back. It was a complete gamble really, but the
pitch centre diameter (PCD) was the same as the hubs of the Mack, and although the rims are much wider and the tyres much
larger than they should be, they fit for now, and once a set of 4 are on then the chassis will be easy to move around.
Investigations in the USA suggest that getting decent wheels exactly the same as the originals will be difficult. We
will see. For now, it will stand on a set of 1100 and 1200 x 24 wheels off a Leyland Landtrain!
The dump body consists of very re-useable forgings and very rusty and un-useable sheet steel. The latter will be
scrapped (once measured, drawn and photographed) and the former will be removed, blasted and pressed back into service.
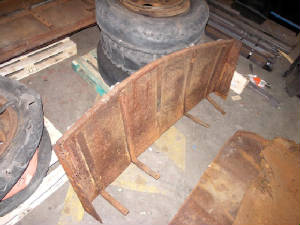
This shot shows the headboard of the dump body:
The cab has now been cut away, starting with the main "C" shaped structure, then the lower portions. I took particular
care removing the almost complete and intact timber windscreen surround. It is very fragile in places but is an excellent
pattern and has an almost complete set of hinges and frame iron parts (all of which will be re-used)
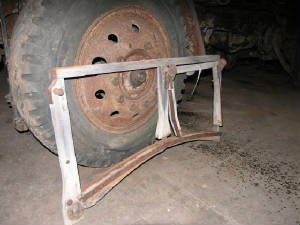
This next shot shows both the windscreen frame and one of the temporary replacement wheels.
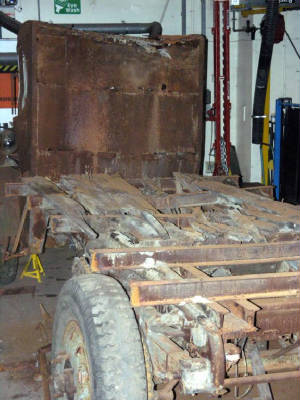
With the majority of the cab carefully removed, the true state of the fuel tank is revealed, and it seems to be in very
good shape, although the securing bands have corroded and come adrift. The next photo shows the tank, which is located
unde the seat in the cab with a central filler:
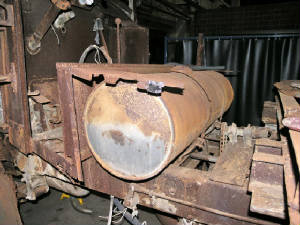
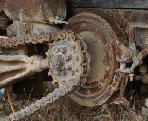
The photo also shows a chain going over a sprocket on a cross member. This is in fact the drive for the tipping
gear. There is a remote power take off driven from the front of the gearbox (which is in the rear of the chassis and
is located just ahead of the jackshaft) which in turn drives this sprocket by chain. A long shaft then heads rearward
into the tipping gear. I do not know at this stage whether the gear is hydraulic or screw actuated.
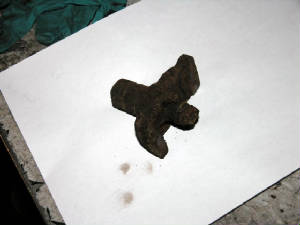
The other main find is the item shown below, which is just one of a number of clamps which Mack used to secure the cab
to the chassis. In order not to compromise chassis strength, Mack advertised that they never drilled holes in the top
or bottom rails of the chassis, so these clamps were obviously used to keep things in place without holes.
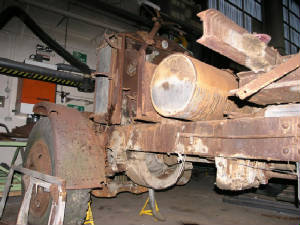
The next stage is to start to dismantle the radiator shrouds and the cover for the flywheel mounted fan. This will
then allow the removal of the engine.
|