|
It is exciting because the whole thing is really taking shape,
but it is laborious because there is a lot of area to cover, and much of it is quite tricky to get right. With lots of locker doors and other angles, not to mention the graceful upper curve of the bodywork, it
is not something to rush. This article covers both how I went about doing it and mentions some of the things I learned along
the way.
|
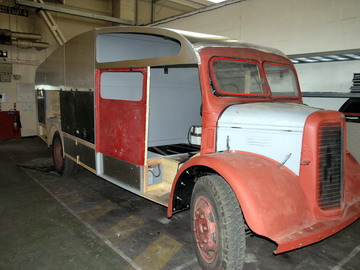
| The panels are a mix of old and new |
I had decided very early on that I would try and utilise original
panels where I could. Not only is that good from a restoration perspective, but
it would also keep me honest in terms of the dimensions of things. Even where
the original panel was too far gone to re-use, I disciplined myself to replicate the panel as near as I possibly could in
new material, even if that meant replicating one or two anomalies. As it was
there are only a handful of re-used panels: the sliding doors, the back lower
corner lockers and the large panels behind the doors (and one of those has a crease in it that I may regret when it is all
re-painted!)
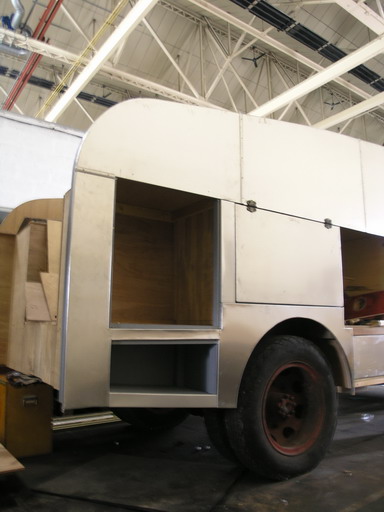
The lockers are a combination of old skins on new frames, new
skins on new frames, and lockers from another fire engine adapted into precise replicas of the originals. The lockers define where the holes are, and the holes define both the layout, and to a large extent, how
the bodywork was constructed in the first place. One of the greatest challenges
has been to combine memory, a few photos, some rotten remnants, a lot of luck and rather too much head scratching detective
work and from all of that design and build in three dimensions.
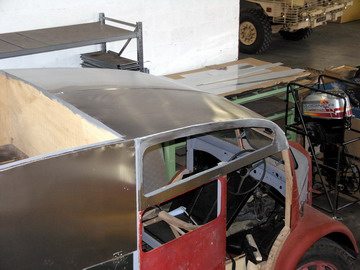
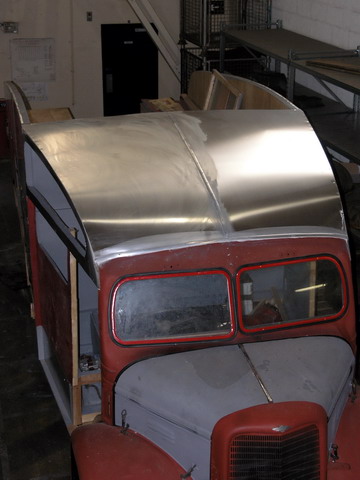
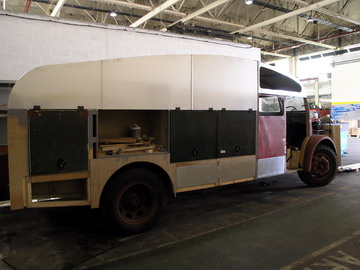
One such puzzle was how I was going to get the “sweep”
of the top edge of the rear body. I had the curve of the top of the cab because
I had the long panels with the big window cut-outs in them. So I could be fairly
confident that the cab roofline was spot on, but what about the rest. It kept
me thinking for many an evening I must say. I thought of hundreds of ways it
could be done but none of them really gave me confidence. I knew where the tops
of the lockers would be, and could therefore surmise that there was a sturdy longitudinal rail running front to back at that
point, but the blades above that were anyone’s guess.
Then, one evening I had a brainstorm. I took a piece of 2 inch wide flat bar, maybe 3/8ths of an inch thick and 20 feet long and clamped it to
the cab roof, letting it follow the curve of the cab roof for the first 6 feet and then just let it dangle the rest. I then clamped sheets of ply to that longditudinal and simply drew the curve formed
by the steel on the sheets which I then cut out. The result is superb, and so
close to the original that it would not surprise me in the slightest if that’s how they did it in the first place!
|
| Getting the right curve for the body came in a moment of inspiration |
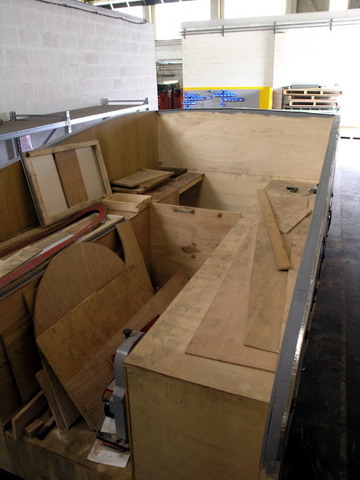
The ply sheet basis has proved to be a very good approach. It is possible to make up a sort of space frame and then skin it all in metal, but
I simply skinned everything in exterior-grade hardwood ply first and then, when I was sure that everything was where it should
be; all lined up and all the lockers fitted snugly, it was just a case of cutting, shaping and fitting the aluminium panels. That latter process is still on-going, but every day sees a little more done. Like most jobs time spent below the surface makes what goes on at the surface easier,
and this is no exception. But it is a big piece of coachwork and it has swallowed
sheet after 8x4 sheet of ply and yard (or meter) after yard of timber. I have
not counted the exact number, but I have just purchased another thousand screws and they are still being swallowed up. By the time I have finished I will be in the market for a new rechargeable drill!
|
| The bodywork has required a huge amount of timber |
|